Kathmandu Mountain Biking Tour Cost at a Glance
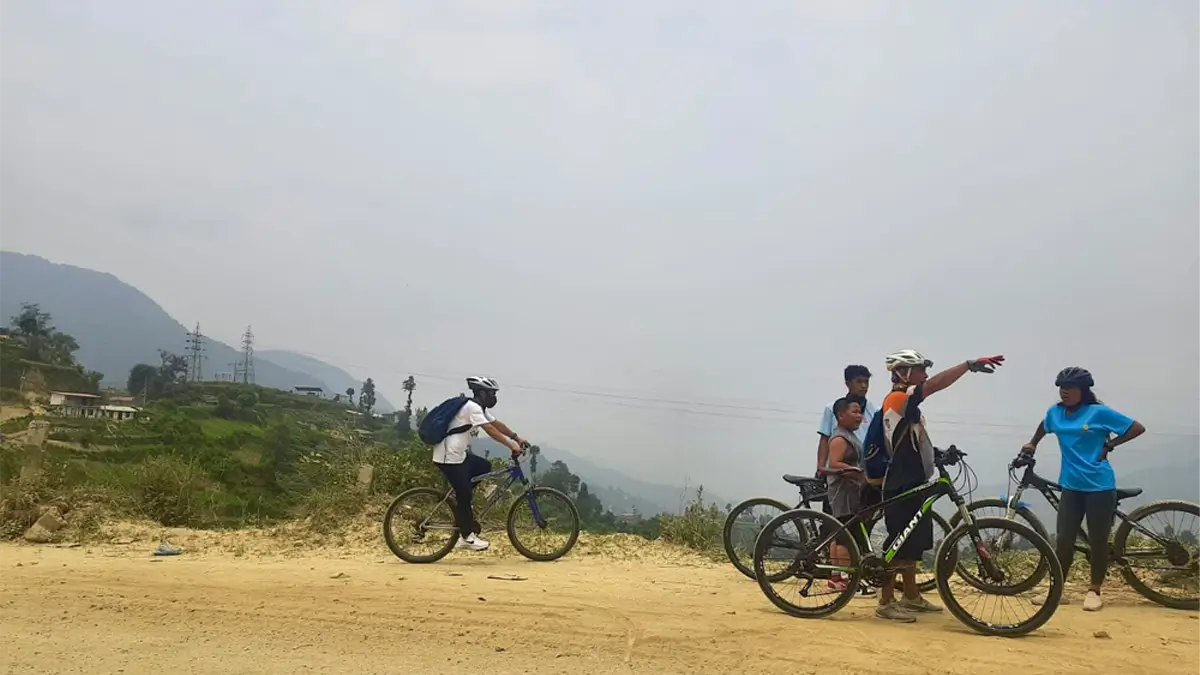
The total price for mountain biking in Kathmandu mainly depends on how independently one intends to travel. For example, if a self-guided rider prefers to rent a normal hardtail, eat simple local food, and begin his/ her trip in the city, this means that the prices will be relatively low. If one wants a personal guide, private transportation, a high-quality full-suspension bicycle, and technical trail support in general, this rider will have to pay more for this service.
| Kathmandu Mountain Biking Option |
Approximate Cost Per Person |
What You are Mainly Paying For |
| Basic self-guided ride with rental bike |
US$15-60+ |
Bicycle rental include helmet, and bike lock |
| Organized one-day mountain biking tour |
Around US$87+ |
Organized ride, bike tools, route planning and normally guiding/logistical arrangements depending on package |
| Premium hardtail + private guide/transport |
US$100-180+ |
Better bike, guide, private transfer, bike tools, and logistics |
| Full-suspension setup |
US$120-220+ |
Full-suspension bike plus guide/transport and trip expenses |
| E-mountain-bike day |
US$150-250+ |
E-MTB rental, guiding and supporting logistics |
These amounts should not be thought of as fixed rates but rather as working ranges. The selection of rental bicycles available in Kathmandu varies greatly. Tourists can rent a bicycle ranging from simple mountain bikes to expensive electric mountain bikes and those with advanced suspensions. One bicycle rental company may charge less because of the bike’s age, while another may charge more because of the technology used in it.
The pricing in today's bicycle rental stores usually sees quality hardtails being priced around $30-45 a day, full-suspension ones costing approximately $70-100, and electric mountain bikes available for about $100. So, it should be understood that a self-organized trip does not bring huge savings. When high-quality bicycles, transportation costs, lunch and park entrance fees are calculated, the cost of independent riding is similar to that of an organized trip.
The most important budgeting principle is to compare the complete riding day rather than one line item. A cheap bicycle rental does not represent the real cost of mountain biking unless you also know how you will navigate, where you will start, how you will return, whether you need a permit and what happens if the bike develops a mechanical problem.
How Much Does a One-Day Kathmandu Mountain Biking Tour Cost?
For a one-day mountain biking tour, you can expect a reference cost of about US$87 per person. It is a fair price for the tour operator providing a riding day with the help of a mountain bike, a helmet, bike tools, guide and some other equipment. However, the offered quality within the price depends on the tour operator and the range of services.
Therefore, one tour can include a bike and helmet, a guide, spare equipment, packed lunch; another one can include only a mountain bike, no equipment, no guide, no support, but help if something goes wrong. Thus, two completely different services can have an almost equal price.
A one-day tour price should therefore always be compared by the services they provide. The most common questions are related to the mountain bike, helmet, route guidance, pickup from the hotel, transportation to and from, lunch, water and entrance fees.
Mechanical support also matters more than many first-time riders realize. If the guide carries a pump, spare tube, tire levers, multitool and chain repair equipment, that adds practical value. If a bicycle problem occurs 15 km from the city, even a minor puncture can become expensive if there is no repair kit and the only solution is arranging a taxi or support vehicle.
Therefore, a one-day Kathmandu mountain biking cost should never be judged only by the advertised number. The real question is what the rider receives for that amount and what additional expenses are still likely during the day.
Kathmandu Mountain Bike Rental Cost
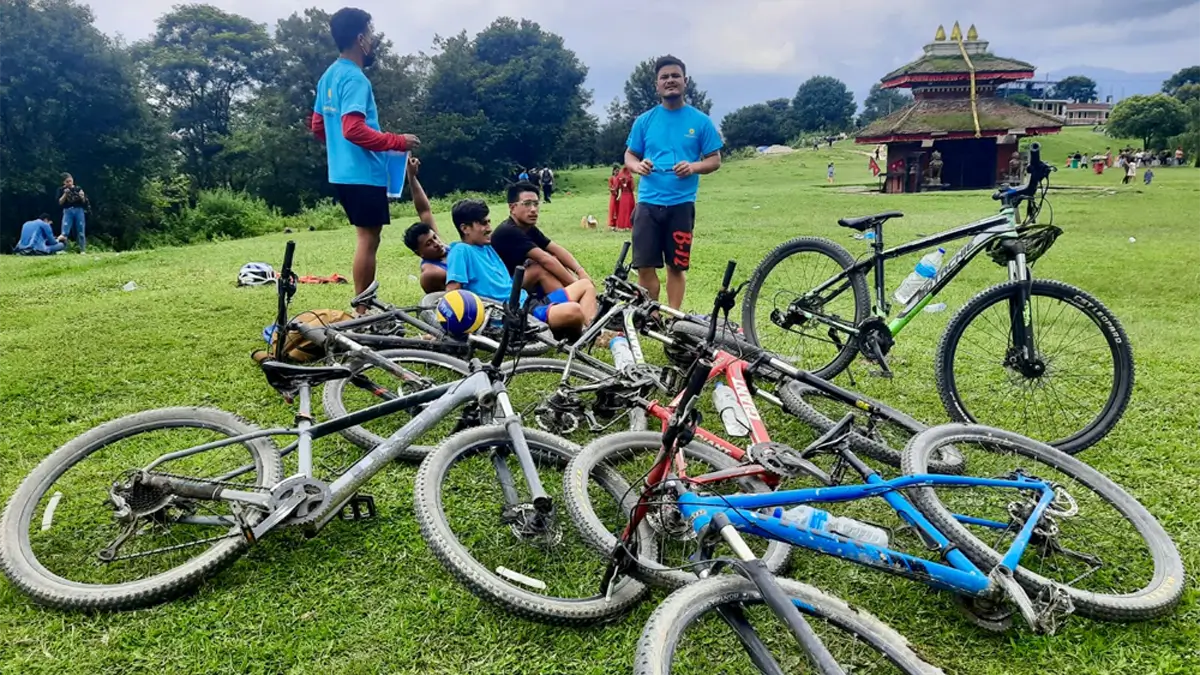
A bicycle rental, for an independent rider, may generally be the largest single expense. The costs are very different depending on the quality of the bike, the suspension, the brand, the age, the drivetrain, the brakes or whether the bicycle is electric.
| Bike Type |
Approximate Daily Rental |
Suitable Use |
| Basic recreational MTB |
US$15-30+ |
Easy dirt roads and short rides |
| Quality hardtail MTB |
US$30-58 |
Mudkhu-Tokha, village roads, cross-country riding |
| Full-suspension MTB |
US$80-100+ |
Rougher and more technical trails |
| Electric mountain bike |
Around US$100+ |
Long climbs or riders wanting pedal assistance |
The better, safer, middle-of-the-road option for just about everything in the Kathmandu Valley is a decent hardtail. It's much cheaper than a full-suspension bike, but has enough front-suspension, braking and gear range to handle the gnarliest dirt road, the kilometre after the tarmac ends and the odd trail section.
What appears to be the cheapest rental can quickly turn out to be the most expensive. Of course, a poorly maintained mountain bike with worn tires, underpowered brakes, rattling gearshift, loose chain, or poorly functioning suspension can quickly become the most expensive rental in the world. Whenever such problems come up, the low rental price quickly proves to be meaningless.
Because of this, a rider must consider condition over price- a US35 to US80 bicycle that has seen better days. The climbs and drops of Kathmandu put far more stress on a bicycle than a level urban street.
What Determines the Price of a Kathmandu Mountain Biking Tour?
Several factors determine the final cost of a Kathmandu mountain biking day. The most important are bicycle quality, guiding, transportation, route choice, group size and support level.
1. Bicycle Quality
The real bicycle can make a difference in the value of your entire day, apart from most other things. A simple mountain bike for your regular use will barely break a person’s wallet. However, if one wants to tackle the trails and ride challenging downhill terrain, one should seriously consider higher-quality brakes, more durable wheels, and the front fork suspension.
The better bicycles feature hydraulic brakes, superior wheels, and excellent gears and suspension forks. Not an extra detail, but a must-have. Powerful brakes are necessary to stop a bicycle on a long descent, and having multiple gears will make climbing not that strenuous for your legs. More durable wheels are safer, especially on rough trails, and excellent tires mean more grip on the ground.
For most of the people who want to go riding around Kathmandu, it is not necessary to get fully-suspended mountain bikes for the money. A hardtail will suffice and will provide a better value-for-money experience, as well as offer more reliability and efficiency on climbs.
2. Guided Versus Self-Guided Riding
Here, the cost factor is guiding. Self-guiding is cheaper, but it means that all of the responsibilities associated with navigation and route-finding fall on the rider. The roads on the outskirts of the Kathmandu Valley and the trails in the villages can hold a few surprises. This could mean that the route can lead through numerous crossroads or agricultural roads, or even through narrow village roads, the nature of which cannot be discerned from a paper map. A line on the map that suggests it is a road can very well turn out to be a footpath, stairway, rough trail, or private road.
The services of a guide become truly valuable when the route contains unknown crossings, allows entering national parks, includes difficult technical trails, or when reaching the city is complex. While experienced mountain bikers can ride on their own, less experienced people may think that guiding is a better solution as far as saving time and minimizing unpredictability is concerned.
3. Private Transportation
Some Kathmandu mountain biking routes can be started from the city, while others are best suited for being driven to. The price is determined by the size of the vehicle, the number of people, the way in which the bicycles are transported and whether the vehicle also picks up the riders on the return journey.
A single person booking a private vehicle will of course have to pay more per person than a group that shares the same transport. This means that group rides tend to be more cost-effective. The cost of the vehicle is shared between several people instead of just one.
The value of transportation should also be measured in terms of practicality. Traffic in Kathmandu can sometimes be the least pleasant part of the ride for visitors who are unfamiliar with the local roads. Paying a little extra for a shorter transfer can avoid buses, motorbikes and heavy traffic and let the rider start directly on less busy roads.
4. Route Choice
The route chosen can alter the day's expense and difficulty. Countryside routes towards Mudkhu, Tokha and Budhanilkantha can typically be done without high protected-area fees. Routes to Jamacho or those entering Shivapuri-Nagarjun National Park need more planning; at least official entrance fees and bicycle fees for some sections will be added.
| Category |
Current Official Charge |
| Nepali visitor |
NPR 100 per person |
| SAARC visitor |
NPR 600 per person |
| Other foreign visitor |
NPR 1,000 per person |
| Mountain bike - Nepali |
NPR 50-100 |
| Mountain bike - SAARC |
NPR 50-100 |
| Mountain bike - foreigner |
NPR 150-200 |
Even though these figures are not huge in comparison with the costs of renting bikes, they still impact the overall cost. You should always check the park policies before you leave, as entrances and admissions policies may change.
5. Group Size
The group size of cyclists guides the cost per person of guides, transport and support. The bicycle is normally a separate cost per person, though the fixed expense of a private vehicle or guide can be shared with other riders.
| Expense |
Solo Rider |
Four Riders |
| Guide |
Entire cost paid by one rider |
Shared |
| Transport |
Entire vehicle cost |
Split four ways |
| Tools |
Carried for one rider |
Shared among group |
| Route planning |
For one participant |
Shared |
| Support logistics |
Dedicated |
Distributed |
This is why a private solo mountain biking day might run you quite a bit more than sharing a day with a few others. The service is the same, but you don't have anyone else covering the fixed costs.
6. Mechanical and Support Level
A simple self-guided adventure is based on the assumption that a traveler can tackle most minor mechanical problems. More sophisticated or upgraded trips may use more resources, such as a guide who carries a repairing tool kit or even a support car.
The most frequent problems are generally not serious. They are mostly flat tires, lost screws, gear adjustments, and problems with chains, tires, and brakes. They can seem easy to fix with proper tools, while they can make the trip unsuccessful without them.
Support contributes to the cost, thus minimizing the chance of wasting a day because of a little problem.
Detailed Kathmandu Mountain Biking Cost Breakdown
It is easier to understand the total price when the major expenses are separated.
Essential Costs
| Experience |
Bidget Estimate |
| Mountain bike |
US$20-45 for quality hardtail |
| Helmet |
Often included; confirm |
| Food |
US$5-10 |
| Water/drinks |
US$2-5 |
| Transport |
US$40+ depending on route |
| Guide |
Variable |
| Park fee |
Route dependent |
| Bicycle park fee |
Route dependedt |
With respect to a typical independent day out, the bike, the food and the water are the only predictable costs. Transport and guiding may not be needed if a skilled battery is used. As for protected-area access fees, they are effective only on certain routes.
Optional Costs
| Optional Expense |
Why You Might Pay It |
| Full-suspension upgrade |
Rough technical trail |
| E-MTB upgrade |
Long climbing or reduced physical load |
| Private vehicle |
Skip urban traffic |
| Support vehicle |
Group safety or flexible pickup |
| Gloves |
Hand comfort and protection |
| Knee/elbow protection |
Technical riding |
| Hydration pack |
Easier drinking while riding |
| Dedicated mechanic |
Larger or specialist groups |
| Private guide |
Flexible pace and route |
Optional costs should be based on demand, not assumptions. Riders will often spend money on premium bikes and eschew more important route planning and transport considerations. Even a basic hardtail and an experienced leader on the ground can often work better than a full-suspension bike in combination with no route planning. yes. Independent riders can reduce the overall cost substantially if they understand the route, rent a reasonably priced hardtail and avoid unnecessary transport.
Is US$87 Expensive for a Kathmandu Mountain Biking Tour?
An organized day priced at approximately US$87 should not be labeled as either high-priced or low-priced because this price depends on the amount spent by a rider when choosing to do a similar day on their own.
For example, in the case of a quality hardtail rental that costs US$20, the rider must pay for food and drink, transport to and from the park where the rides take place, possibly pay for guides, etc. The rental is likely to be exclusive of items such as a helmet and a repair kit, which are likely to be needed by the rider.
After all the expenses have been added up, it can turn out that the difference between self-organization and paying for a tour does not seem significant. However, if the organized tour does not include virtually anything beyond the bike and the itinerary, the independent ride can seem to be better value for money.
As a result, the real comparison must be “USD 87 or USD 200 bicycle rental.
Can You Do Kathmandu Mountain Biking for Less Than US$87?
Yes. Independent riders can reduce the overall cost substantially if they understand the route, rent a reasonably priced hardtail and avoid unnecessary transport.
| Item |
Example Budget |
| Bicycle |
US$20-35 |
| Food/snacks |
US$5-10 |
| Water |
US$2-4 |
| Transport |
US$0-10 |
| Minor contingency |
US$5-10 |
| Estimated Total |
US$37-87 |
You could expect a budget like this from an experienced rider on a simple countryside ride. But the risk is a little greater. You need to go by yourself, fix your own bike, carry repair gear, plan your route and make arrangements for a return trip if necessary.
Doing the journey for less than US$87, but we don't recommend this as a replacement for a managed ride unless the rider can handle all the planning themselves.
How to Do a Kathmandu Mountain Biking Tour?
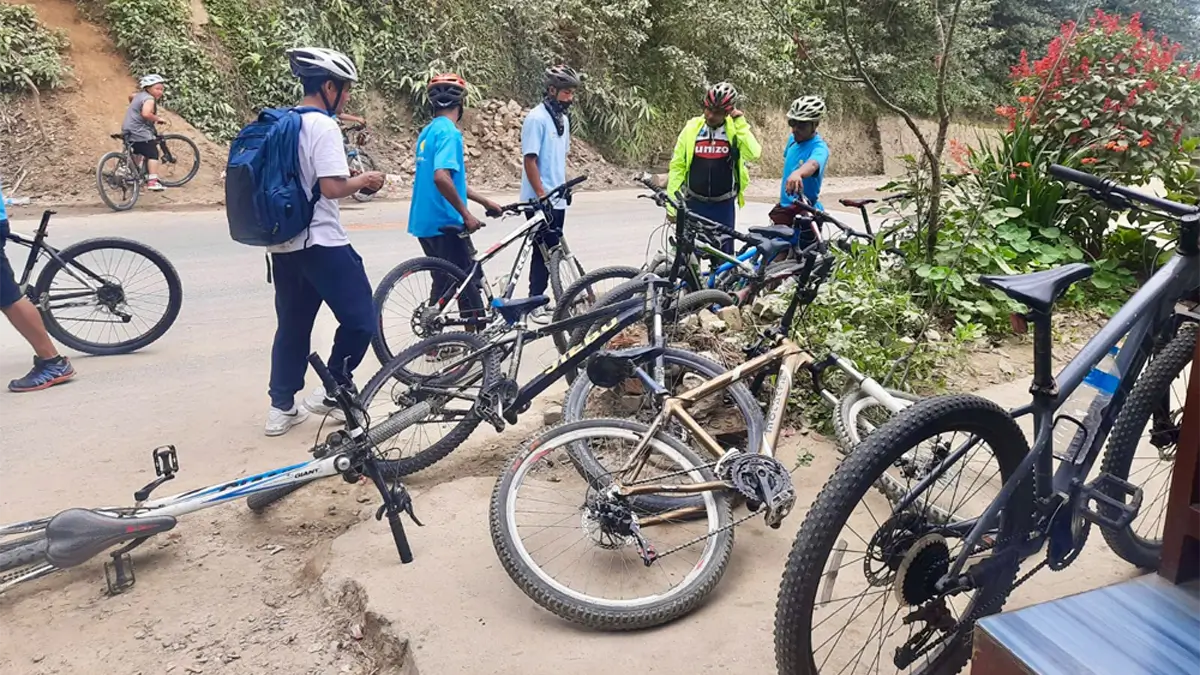
Organizing the ride properly is mostly a matter of priorities. First, decide on your budget, then think about whether you want a guided tour or to be able to explore independently. Next, pick a route, select a bicycle, inspect the equipment, and prepare the necessary amount of food, drink, spares, and other provisions.
It is not advisable to prioritize the bicycle, as this will depend a lot on the area of the route. A full-suspension bicycle may seem like an overkill for a lazy loop around local village. At the same time, a simple recreation mountain bike would not be appropriate for a steep forest trail.
Step 1: Decide Your Kathmandu Mountain Biking Budget
Before even thinking of what Kathmandu mountain biking routes you want to choose, decide on your budget.
If you are an independent rider willing to explore the local trails by yourself without guides or specific equipment, you would set aside around 40-80 USD for a comfortable day. This would allow you to buy a good hardtail, prepare some food and drinks, and pay for local transport if needed.
An organized day, by contrast, will cost you around 87-120 USD for a moderate experience and 150-250 USD+ for a premium experience. The amount of money will depend on how much you want to be taken care of - from choosing the most convenient routes to a private guide, full-suspension, or e-MTB bicycle.
Setting the amount of money, you are willing to spend will help you prioritize your ride and choose only the best available options.
Step 2: Choose Guided or Self-Guided
Riding with a guide is the best solution for travelers who do not know their way around Kathmandu’s roads and trails. The advantage of going with a guide is knowledge of which routes are preferred by locals, as opposed to just following someone in front.
A tour guide can make choices about less crowded links, determine confusing intersections, adjust speed, and fix mechanical troubles as they occur. On protected routes, guides know how to go through admission and restrictions.
Going solo may work for mountain bikers who know how to deal with different types of traffic and navigate offline. Riders also need to know how to change a tube, maintain primary bike parts, and react to unpredictable route changes.
The choice is based more on experience than on money. Saving money by going without a guide does not sound like a wise decision if a traveler ends up spending a few hours on the road or quitting because of a flat tire.
Step 3: Choose the Right Kathmandu Mountain Biking Route
Route choice defines much of the challenge and value of the day. For a single-day trip, the best options are Mountain biking Mudkhu-Tokha, plus Jamacho and Budhanilkantha-Tokha, which represent the three basic types of mountain-bike riding around Kathmandu.
Mudkhu-Tokha Mountain Biking Route
Mudkhu-Tokha is one of the better options for a visitor who wants to have a true mountain-bike experience without going in any direction for an extremely technical trail. Depending on where you start and which of the several variations you choose, Mudkhu-Tokha can range from about 25 to 30 km.
It is a mix of dirt and paved roads, as well as some trails through villages and fields, so the challenge level varies throughout the ride, with the difficulty rising as you get away from the city. This route is a good value for a visitor, since it is unlikely to require special equipment beyond a hardtail and offers a wide variety of terrain while avoiding the very technical trail sections.
If you are riding a full-suspension mountain bike, you might think of this as an easy day’s ride, without the high cost of a park permit and without having to navigate through technical trails.
Jamacho Mountain Biking Route
Jamacho is more of a physical challenge and involves extra planning because of its location on the Nagarjun side of Shivapuri-Nagarjun National Park.
The main difference is the climbing involved, which will make the ride much harder than one might expect based on the simple calculation of kilometers. A day's ride of 25 km in the countryside may seem to be little more than a warm-up after a few days of climbing, but the elevation gain on the road ahead will change that.
Because the ride goes through a protected area, be sure to budget additional time for the official park entry and mountain bike permit. For foreign riders, your expense budget should include current national-park entry costs as well as the extra charge for a bicycle.
The ride is appropriate for stronger riders who are looking for climbing and the fun of riding through a forested mountainous area. A good hardtail will do, although brakes and gears should be in excellent condition because both climbing and descending require more effort than a similar but flatter ride.
Budhanilkantha-Tokha Mountain Biking Route
Between Kathmandu and the northern edge of Budhanilkantha and Tokha mountains is another one-day option for the touring cyclist. The route can be modified to suit your time and fitness level.
Depending on the combination, a rider has the option of smooth connections, village roads, some dirt, and gradual climbs up foothills. This provides a good alternative for a mixed-surface day, but less technical than many mountain-bike routes.
Again, the most practical kind of bicycle is a hardtail. Fortunately, the cost is usually reasonable since it is frequently possible to organize a ride without big expenditures.
Which Kathmandu Mountain Biking Route Should You Choose?
| Rider Type |
Better Route Choice |
| First-time recreational MTB rider |
Mudkhu-Tokha |
| Moderate rider wanting countryside |
Mudkhu-Tokha or Budhanilkantha-Tokha |
| Strong rider wanting climbing |
Jamacho |
| Rider wanting forest environment |
Jamacho |
| Rider on limited budget |
Mudkhu-Tokha or near by |
| Rider wanting lower logistical complexity |
Mudkhu-Tokha/Budhanilkantha |
| Rider comfortable with park formalities |
Jamacho |
The most scenic trail is not always the most direct. Think about how far, how much climbing, how long you'll be on the bike, the trail surface, technical bits and whether you can turn back early.
Step 4: Choose the Correct Mountain Bike
The correct bicycle depends on the route rather than price or appearance.
Hardtail Mountain Bike
In most Kathmandu travels, using a hardtail bike is the best choice. The hardtail bike provides front shock absorption but does not require an additional rear suspension system.
A hardtail bike climbs well and is lighter than its full-suspension counterpart, making it much cheaper to rent. On uneven roads, hard-packed dirt, and rocky tracks, generally, a hardtail bike can do everything required by the biker.
Full-Suspension Mountain Bike
A full-suspension bike is a good choice only in cases when the rider needs to tackle climbs with difficult downhill sections, stony trails, and rough terrain.
For an average bike ride out of town, spending more money on renting a full-suspension bike does not bring much advantage, as such bikes are heavier, more expensive, and require greater investment.
Opting for a full-suspension bike should depend on the conditions of the terrain, not on the excess of such bikes and their overpriced status.
Electric Mountain Bike
Electric mountain bikes make climbs much easier and are perfect for mixed-ability riders.
Remove all your skids before getting to the key. Make the most of the complete gear assortment before leaving. The chain ought to shift easily without excessive skipping.
Focus especially on the lowest climbing gears, as you'll be using them more frequently on the steeper sections.
The key drawback of electric mountain bikes is the expense attached. Costing approximately US$98 per day excluding other expenses, renting the e-MTB itself may cost more than riding an average mountain biking trip.
It is essential to check the battery condition and the battery life before renting an e-MTB to use during your cycling trip to avoid unpleasant situations during the ride.
Step 5: Inspect the Bike Before Paying or Leaving
Never take a rental mountain bike onto the trail without checking it first.
Check the Brakes
Both front and rear brakes should work effectively and without taking the levers to the handle. The braking system is one of the vital features for cyclists making the many steep climbs and descents of the capital of Nepal.
Make sure to check for excessive rubbing of the rotor and the efficiency of the brakes.
Check the Tires
Check the tires for their tread, sidewalls, and air pressure. They should not be worn out or cracked.
Moreover, find out whether the bike has tubes or tubeless tires, as it is important for choosing the right repair kit.
Check the Gears
Shift all the way through the gears before you go. The chain should not skip badly.
Pay particular attention to the easiest climbing gears, as you will be using them the most on steep terrain.
Check the Chain
A dry, rusty or damaged chain is a good indicator of poor maintenance. The drivetrain doesn't need to look new; it just needs to operate smoothly.
Check the Wheels
Give both wheels a spin and check for out-of-control wobble or rub. Check that the wheels are tight in their axles too.
Check Saddle Height
An improperly adjusted saddle height can turn a moderate ride into a brutally long day. You should be able to almost touch the ground with the ball of your foot when on the bottom of the pedal stroke.
Check Suspension
The fork should not be completely stiff or clearly leaking oil. If this is the case, ask for another bike or have this one serviced.
Check What Comes with the Rental
Double-check that your Rental comes with a helmet, pump, tube, tire levers, lock and multi-tool. Always assume they don't come with these items!
Step 6: Carry the Minimum Repair Kit
A basic repair kit is essential even on a one-day ride. Your kit should include a spare tube (that fits your wheels), tire levers, a mini pump, a multitool, and some basic puncture patches. A chain quick link is also a good idea, in case you break a chain link and have to end your ride early. Even if you're riding tubeless tires, you should still carry a spare tube in your repair kit. A large puncture on a tubeless tire's sidewall can be impossible to patch and you may need to carry a spare tube as a backup. A repair kit is an inexpensive investment compared to the cost of hiring a rescue vehicle to pull you out of the mountains following a flat tire or mechanical issue.
Step 7: Download the Route Before Starting
Navigation is one of the easiest ways to add risk to a mountain bike tour.
Before leaving your hotel or the bike shop, download the route you'll be riding. Mark your map with your starting point, major junctures, possible places to stop for lunch, trailheads and where you'll turn back toward your starting point. While you may have a mobile data connection to help with navigation, you should assume that data connections can be spotty and download maps as backup.
You should also take photos of tricky junctions and intersections to use as a secondary reference if your GPS application freezes or loses signal.
Step 8: Start Early
For most mountain bikers, leaving at dawn isn't just a romantic notion; it's a practical matter.
Leaving early in the morning has advantages on nearly every type of trail. Traffic is typically lighter, temperatures are generally more moderate, and you have more daylight hours to reach your destination or deal with mechanical issues. A four-hour ride shouldn't be stretched into a four-hour day, because you'll also need to allow time for breakfast, bike maintenance and mechanical issues, route clarification, and photo ops. Starting earlier gives you enough time to shorten your day for an unexpected puncture or mechanical issue, and you'll still have plenty of daylight for returning home.
Step 9: Handle Kathmandu Traffic Carefully
For some riders, Kathmandu traffic is the hardest part of the whole experience.
In addition to buses and taxis, Kathmandu's streets are filled with narrow alleys, motorcycle taxis, pedestrians and complicated intersections. Riders unfamiliar with the city should avoid weaving in and out of traffic or trying to navigate complicated turns at the last moment. If you're not comfortable with these conditions, it may be worth spending a few extra dollars on a private transfer to a less congested part of town.
Saving a few dollars on a private transfer and riding traffic the hard way won't help you if you spend the first hour of your ride riding with your muscles clenched and your heart racing.
Step 10: Manage Water Properly
Water management must consider route difficulty rather than distance. A climb in elevation of 25 km requires more hydration than a flat 40 km ride in the city.
In any event, a good rule of thumb is to start with about 1.5-2 litres of water in the warmer months. However, individual requirements vary depending on the weather and an individual’s physiological needs. Don’t expect to find numerous shops in your path.
Step 11: Carry Food Even If Lunch Is Planned
No matter how short a ride it may be, one should always carry a snack in case the ride takes longer than planned.
Traffic delays, breakdowns or any difficult terrain may happen and lead to new challenges. A banana or any other snack will help save precious energy on an excursion to a restaurant. After all, food costs you practically no money.
Step 12: Know When to Turn Around
The proposed route should never be more important than the situation on the ground. When brakes begin to slip, the trail becomes slick with rain, or darkness is fast approaching, then it is time to head home. As well as running out of fuel, other mechanical failures and common sense. A mountain biking day is judged by the speed (and security) of your ride, not by how many Km you manage to cover on that day.
Do You Need a Permit for Kathmandu Mountain Biking?
Most of the mountain biking routes in Kathmandu do not involve the need for permission. Country roads and common routes in the countryside can normally be travelled freely without national park entrance fees. However, routes leading to the Shivapuri-Nagarjun National Park require formal payment. This is especially significant for both routes, Jamacho and Nagarjun.
Before choosing any route into a protected territory, make sure to check the latest visitor fee, bike fee, or any obligation connected with the hire of a guide.
Current Shivapuri-Nagarjun Mountain Biking Cost
The current official fee structure places visitors into separate categories. (but cost will be change slightly up or down.
- Nepali Riders: Nepali riders now have to pay about NPR 100 as their ticket fee, with a small security fee for a bicycle depending upon the category.
- SAARC Riders: SAARC visitors are now required to pay NPR 600 as their entrance fee and an additional amount for the mountain bike.
Other Foreign Riders: Other foreign visitors should pay NPR 1,000 as their entrance fee and an accumulation of NPR 150 for the bike. These costs are relatively small compared with bike rental, but they should still be included when calculating the complete Jamacho budget.
How Much Cash Should You Carry?
There are reasons to bring Nepalese rupees, even if the guide and bicycle have already been purchased.
The trio might spend cash on a drink or snack, pay for entry to a park, make small food purchases or spend on transport or spare money for repairs. It's not always so easy to pay with cards and online.
A reasonable spare allows you to adapt if the route changes or you have to return by local transport.
What Should Be Included in an Organized Kathmandu Mountain Biking Price?
An organized price should always be evaluated by looking at inclusions rather than only the final figure.
- Bicycle: It should be clear what sort of bicycle is being offered in the package. A simple recreational bike should be differentiated from a modern hardtail bike with hydraulic brakes.
- Helmet: One should verify that a helmet is actually included in the package. The fact that one is available is not enough - having the right size is also important.
- Guide: A guide can only be of use if they are knowledgeable in both the logistics of the trip and bike mechanics.
- Transportation: Make sure to check if transportation from the hotel and back is included in the package.
- Meals: The price of the lunch offered can greatly change the price of the tour.
- Drinking Water: Water may be provided for free or may need to be bought separately.
- Entry Fees: Jamacho and other trips of this kind may include special fees, so it is important to clarify whether they are included in the package or not.
- Repair Equipment: The guide or supporting team should be equipped with a pump, spare tube, and some basic tools.
What Is Usually Not Automatically Included?
Many packages do not automatically include personal insurance, upgraded bikes, technical protective equipment, alcoholic drinks, private purchases, tips or emergency transportation outside the planned itinerary.
The exact exclusions vary, which is why the rider should ask for a complete written breakdown.
How to Compare Two Kathmandu Mountain Biking Tour Prices
Two prices should never be compared without looking at what is inside them.
| Component |
Tour A |
Tour B |
| Bike |
Included |
Included |
| Helmet |
Extra |
Included |
| Guide |
Included |
Included |
| Transport |
Extra |
Included |
| Lunch |
Extra |
Included |
| Water |
Extra |
Included |
| Repair kit |
Unclear |
Included |
| Park fee |
Extra |
Extra/Included depending on package |
Such a package may appear cheaper than an US87 package - but add in costs for transport, helmets and food, and the difference may no longer exist.
So, that is why the effective cost per riding is better than the headline price.
How Difficult Is a 25-30 km Kathmandu Mountain Biking Tour?
Just considering distance isn't enough for gauging difficulty. Riding 25 km on a normal paved highway can be easy work; riding the same distance in Kathmandu presents challenges of climbing, loose surfaces, traffic, and technical descents.
While a fairly fit individual might do a moderately difficult 25-30 km ride, experience in handling the particular mountain bike is also a factor.
Someone fit might find themselves sluggish on a steep and loose descent while, conversely, a person with considerable technical skill might find climbing difficult.
How Long Does a Kathmandu Mountain Biking Tour Take?
The average duration of a 25-30 km mountain biking day is four to six hours, depending on the nature of the trip.
Total time may include much more than cycling; each stoppage for food, navigation, taking pictures, or mechanical problems adds to the time.
also plays a role in the start and finish of the trip.
How to Ride Kathmandu Mountain Biking Trails Safely Without Overspending
One of the most effective approaches to managing costs is to buy what impacts safety and reliability.
A good brake system, a good helmet, the right tires, understanding of the route, and taking plenty of water are much more valuable and useful than cool accessories.
You as a cyclist may be able to take care of expenses if you choose to be on a hardtail bike rather than one with full suspension, ride out of town when there is no rush, take a companion to share the cost, and carry your food with you.
It's not about sacrificing every expense but preventing unwarranted expenses whilst having the necessary preparations.
Is a Full-Suspension Bike Worth the Extra Cost?
You probably do not require full suspension for most one-day excursions in Kathmandu.
Just a good solid hardtail is always lighter, more affordable and better for ascending than a full-susser.
A full suspension bike is worth the cost on the rough terrain if having that additional bit of control and comfort makes a difference.
For dirt roads, walking through towns, and moderate terrain, this is excessive; USD 30-60 to get rear suspension is not justified.
Is an E-Bike Worth It?
An e-MTB is valuable for climbing-heavy riding.
It allows riders of different fitness levels to ride more comfortably together and makes longer routes achievable.
However, the cost difference is huge. If a conventional hardtail costs you around US30-60 and the e-bike costs around US300, it's a significant increase in your day's spending.
Therefore, the decision whether to go for the sportier and more technical e-bike should be made based on physical need or riding preferences.
Should You Bring Your Own Mountain Bike to Kathmandu?
For the sake of a single riding day, it's usually easier to rent a bike locally rather than bring your own mountain bike with you through international travel.
In addition to airline baggage fees, you'd have to deal with the hassle of bringing your bicycle with you, assembling it, getting it to the riding area, and returning it.
It's more sensible for people who are already traveling in Nepal on their bicycles or planning a longer bike tour in the region.
For a single-day Kathmandu cycling experience, it's not worth it.
Can Beginners Do a Kathmandu Mountain Biking Tour?
Beginners can absolutely do a mountain biking tour if the route is well picked.
Rather than going right into Jamacho Hill, a countryside route with moderate climbing and minimal technical descending is a much better beginner-friendly option.
Physical fitness doesn't equal the level of experience. A physically strong person who hasn't had the chance to ride their bike on uneven ground before will be just as much of a beginner as an out-of-shape but technically skilled rider.
When speaking with your guide or the rental shop about your level, give them an honest account of your riding experience, not your fitness level.
Practical One-Day Kathmandu Mountain Biking Budget Examples
Example 1: Independent Budget Rider
| item |
Estimated Cost |
| Hardtail rental |
US$20-30 |
| Food |
US$8 |
| Water |
US$3 |
| Local transport |
US$5-10 |
| Emergency reserve |
US$30-40 |
The financial cost of riding here, in this instance, is only slightly below $US82, perhaps best suited to someone who thinks they are capable of handling the ride on their own.
Example 2: Organized Standard Ride
For a second scenario of a usual journey, it would cost an estimated amount of US$87 and include little expenses in drinks, snacks or other discretionary expenditures.
On the whole, a reasonable budget was US$ 92-120 where everything is accounted for.
Example 3: Independent Jamacho Hill Rider
For an independent Jamacho rider, you will have to budget for a good mountain bike, food, drinks and park fees.
Furthermore, they will have to pay the fee for national park admission and the mountain bike.
The price depends on whether you're taking your ride from Kathmandu or doing it in a vehicle.
Example 4: Premium E-MTB Day
On the other hand, for the last example of an e-MTB experience, renting an e-MTB will be about USD 100 (Excluding guiding and transportation services) and the total price can be up to USD 150. It is possible to increase the amount with the inclusion of a guide, using different private transport, food and payment for the protected area.
Hidden Costs to Ask About Before Booking
The highest hidden costs aren't typically large, but several small expenses can add up to an unexpected amount.
Hotel pickup, bike delivery or helmet rental, premium upgrades for your ride, park fees, food, support vehicle and late return surcharges, insurance deductibles, and other expenses vary from company to company.
Your damage policy matters too, as there are differences between normal trail wear and tear and chargeable damage.
What to Wear Without Buying Expensive Cycling Gear
A rider doesn't need to dress like a racer to enjoy a recreational Kathmandu bike tour.
Comfortable but flexible shorts, a breathable shirt, closed shoes, a helmet and a light jacket.
Gloves are recommended for long descents.
Loose clothing that could potentially catch on the chain or other parts of the bicycle should be avoided.
How to Keep the Ride Within Budget
The best way to control the costs is to make the choices in the right order.
Prioritise the route choice as it dictates whether you require park fees, premium equipment or transport. Then select the cheapest bicycle that will be mechanically acceptable.
Decide if a guide is really required based on your experience rather than simply budgeting them out.
If possible, share costs of transport and guiding with other riders.
Finally, check what is included before paying. This avoids the budget trap of paying for things that could have been included in a package.
Common Cost Mistakes
The most common budget traps are selecting the cheapest bicycle without inspection and paying for expensive full suspension when it isn't required.
It is also common to forget park fees or assume that hotel transfers will be included. Return logistics can also add hidden costs, especially on routes that finish some distance from the rental shop. Food and water are small costs but should be factored in as they impact the rider's ability to complete the day comfortably. Depending solely on ordinary online mapping can add costs if the rider becomes disoriented and requires transport back to the city.